Making a Depth Gauge
For years I have used a homemade depth gauge to
establish how deep a bowl is before I finish hollowing it out.
This gauge works equally well on irregular as well as round edge
bowls. It can be made to any size.
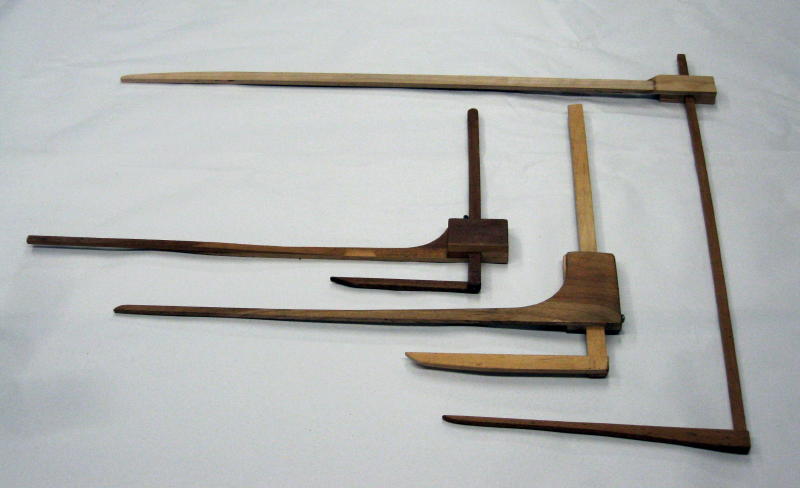 Here is my set of depth gauges. The one I use the most is the
middle one. The center one is great for small bowls.
Here is my set of depth gauges. The one I use the most is the
middle one. The center one is great for small bowls.
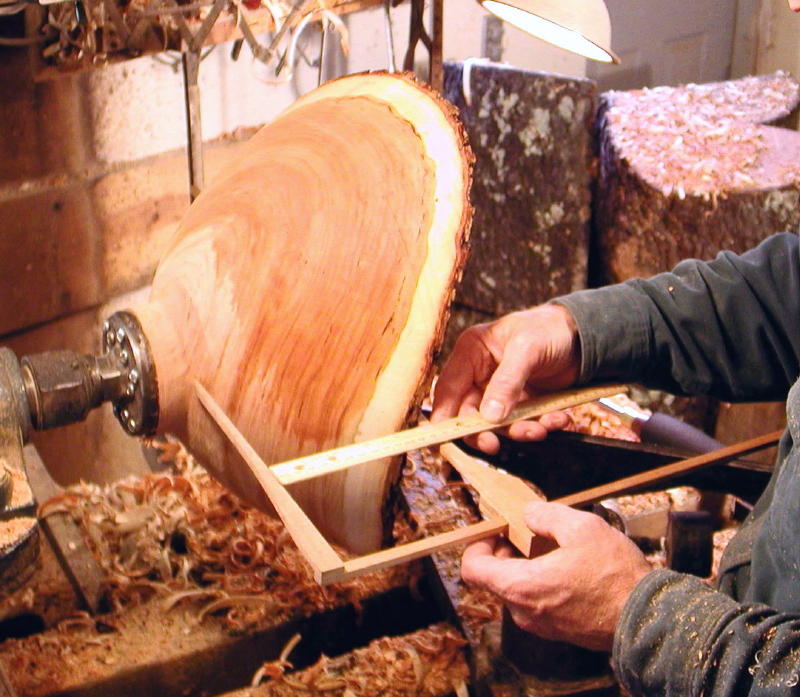
To use the depth gauge, first find two spots on opposite sides of the bowl at the same height from the base by rotating the bowl slowly by the tool rest set close, and mark them with chalk. Align the long leg of the depth gauge across the two marks, set the short leg to the bottom of the bowl, and note the distance with a ruler.
I subtract 5/16" from that measurement (maybe 3/8" for a big bowl) to arrive at the depth of the inside of the bowl I want to turn to, so the undercut at the center of the bottom comes to a bit over 1/8" thick.
Now on to making a depth gauge yourself:
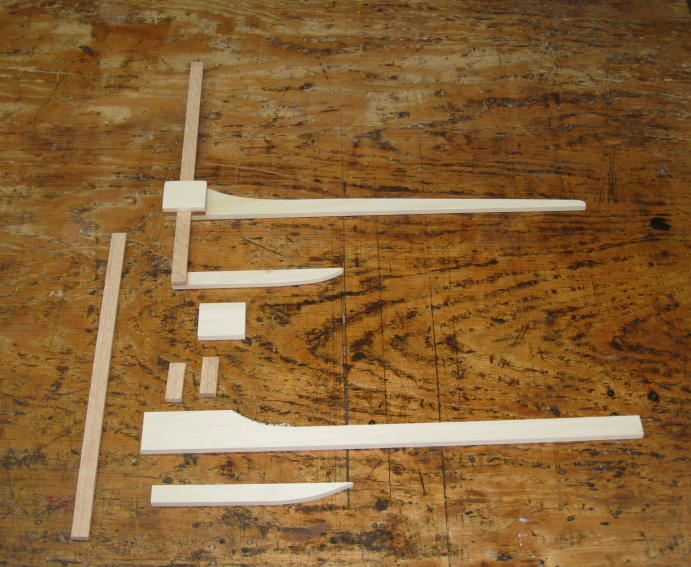
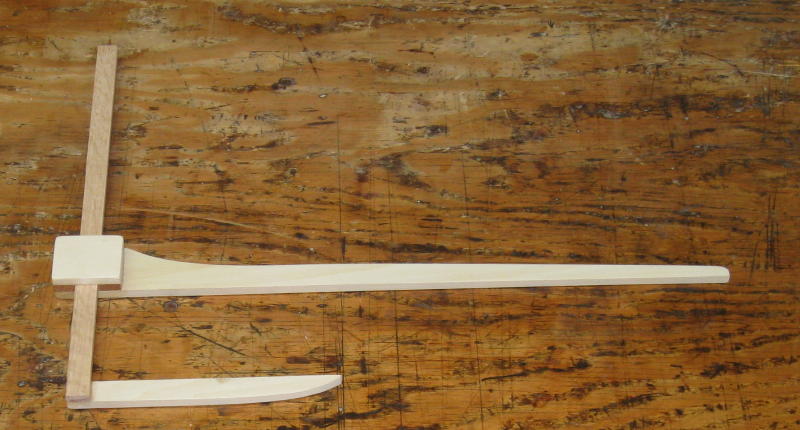
Here is a finished gauge with the parts below it. I used oak stock for the main post for hardness and wearing characteristics, and poplar for the horizontal legs for lightness and stability. (I happened to have an appropriate board of each when I ran the stock for a set of 40 for our club.) The ones I use regularly myself are of maple and cherry. You want the gauge to be as light as possible for comfort of use, while large enough cross sections to minimize warping over the years. The oak is 1/4" x 5/8 wide". The long piece is 15", the two short pieces cut out of the exact same stock are 1 3/4". The poplar is 5/16" x 1 3/4" wide, with long leg length of 19 1/4", short leg 7 1/2", and cap length of 1 7/8", which equals three widths of the 5/8" oak post." To reduce weight I would recommend thinner stock for the horizontal parts, say a heavy 3/16" or a light 1/4." This gauge will do bowls up to 12" deep x 18" dia.
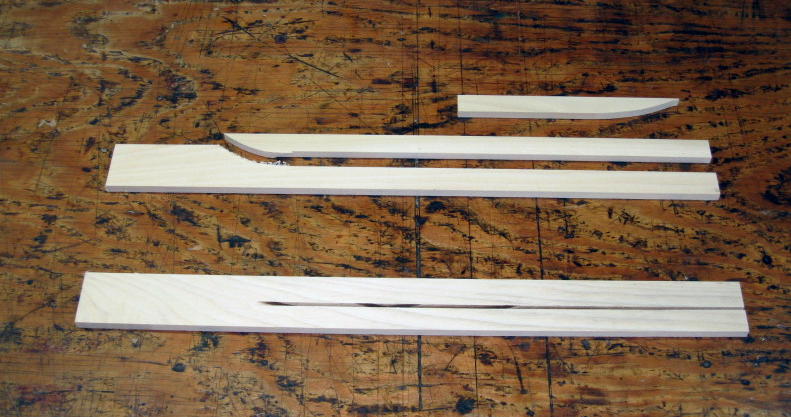
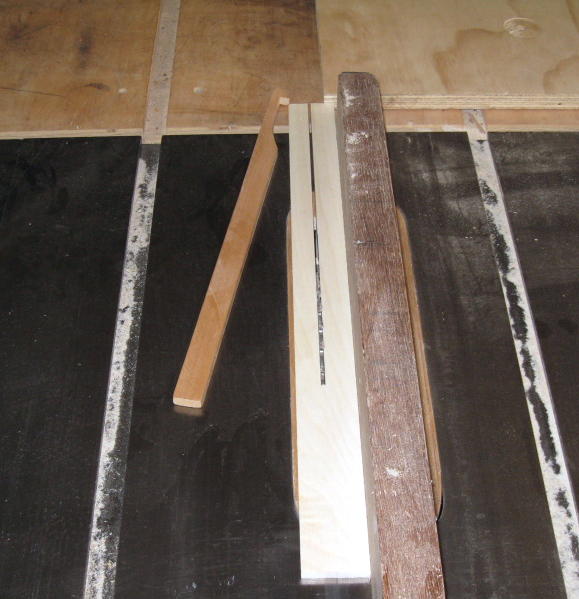
Here are the poplar blanks after ripping on the tablesaw, and then after quick cuts on the bandsaw.
This is the simple tool I use to pull the poplar up and off the blade after it hits the stop.
My left hand uses the hook tool to grab the end and pull up, the right hand providing a pivot point.
At all times my hands stay in front of the blade. The only danger is kickback from the wood pinching the blade, but it can't throw my fingers into the teeth.
An alternative method is to wear a neoprene glove (hunting or diving equipment) on your right hand. The grippy material will let you pull the stock back from the end under your thumb.
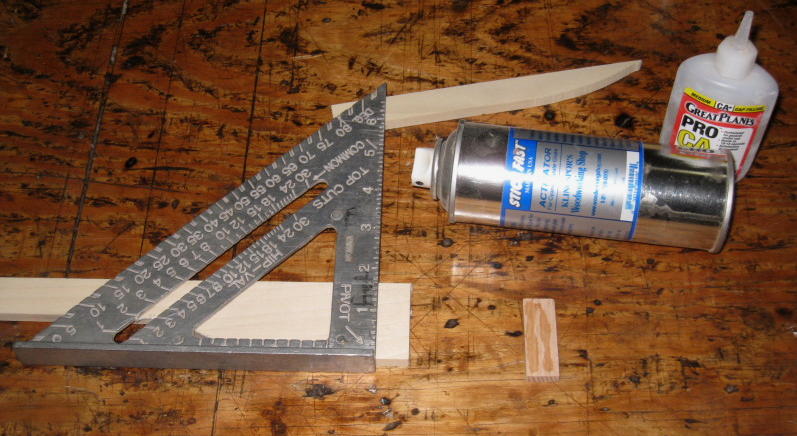
A little try square sets the stop to glue the first strip to. Accelerator is sprayed onto the main piece. Notice the thin line of medium superglue. The dry space to the right side of the strip will rest against the square when flipped over.
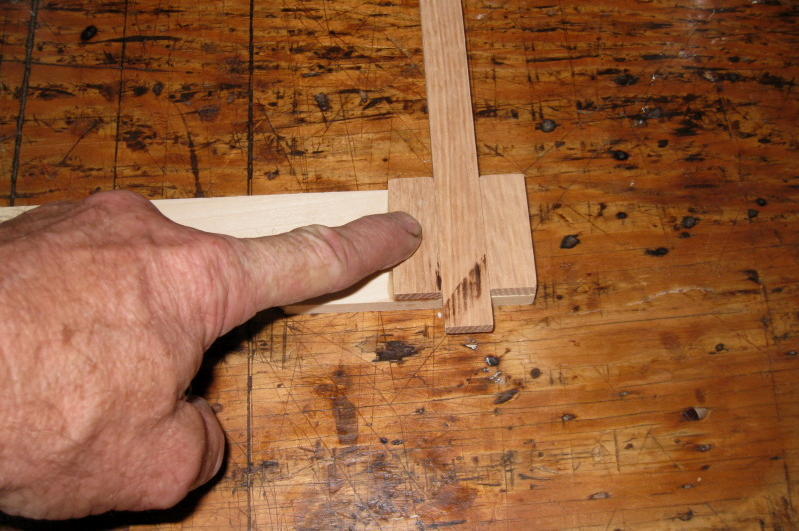
The first strip is glued on. Rub paraffin on one end of the oak post to prevent gluing it below.
The second strip glued in place. Remove the oak post as soon as you feel the glue has set enough to hold.
Clean out glue that squeezes into the groove.

Re-wax the post, put glue on the strips, and spray the cover piece with accelerator.
The cover piece glued on. Once again, remove the post as soon as the glue has set just a bit,
so you can jar it loose should some glue squeeze out start to glue the post into place.
The pointer arm ready to glue onto the end of the post that was NOT waxed.
But wax the bottom of the main beam to prevent unwanted gluing.
Just a touch of glue.
The bottom pointer glued on, with blocking to support it parallel to the main beam.
As SOON as it has set enough,
tap the oak post down to make sure nothing is glued to the main beam.
Now add glue fillets to strengthen the joint.
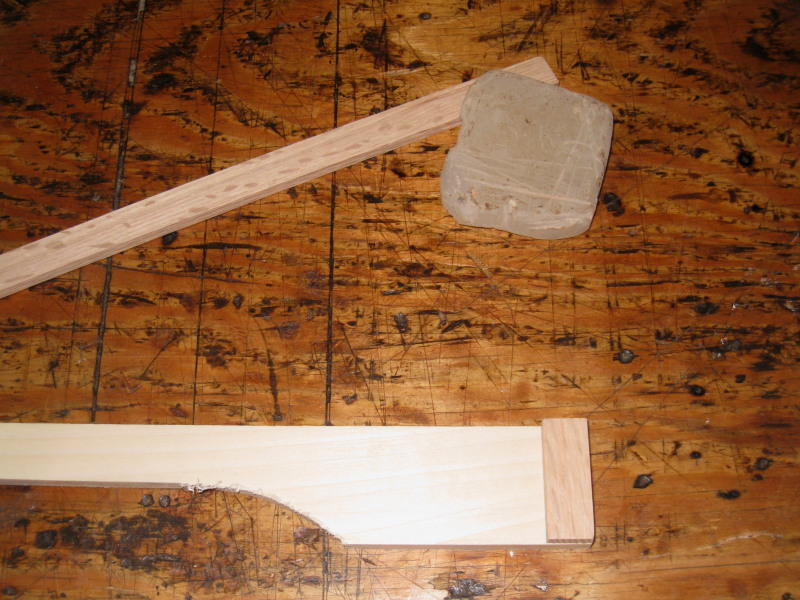
Lay out lines to taper the main beam and fair out the curve to the connector.
Sand it smooth, rounding all but the edge that faces the pointer strip.
Voila, the finished depth gauge. Sand to suit personal standards. The post may be sanded
if it is tight, then waxed for smooth operation. It should be easy to slide but it needs to hold
it's place with no rocking or tendency to slip, and you will find it gives you accurate results.
A rubber friction washer illustrated below will smooth the operation.

Small sections of automotive rubber tubing make a friction brake against the oak post.
You can adjust it to the exact firmness you want to hold it in place for a measurement.
Here is my set of depth gauges. The one I use the most is the
middle one. The center one is great for small bowls.To use the depth gauge, first find two spots on opposite sides of the bowl at the same height from the base by rotating the bowl slowly by the tool rest set close, and mark them with chalk. Align the long leg of the depth gauge across the two marks, set the short leg to the bottom of the bowl, and note the distance with a ruler.
I subtract 5/16" from that measurement (maybe 3/8" for a big bowl) to arrive at the depth of the inside of the bowl I want to turn to, so the undercut at the center of the bottom comes to a bit over 1/8" thick.
Now on to making a depth gauge yourself:
Here is a finished gauge with the parts below it. I used oak stock for the main post for hardness and wearing characteristics, and poplar for the horizontal legs for lightness and stability. (I happened to have an appropriate board of each when I ran the stock for a set of 40 for our club.) The ones I use regularly myself are of maple and cherry. You want the gauge to be as light as possible for comfort of use, while large enough cross sections to minimize warping over the years. The oak is 1/4" x 5/8 wide". The long piece is 15", the two short pieces cut out of the exact same stock are 1 3/4". The poplar is 5/16" x 1 3/4" wide, with long leg length of 19 1/4", short leg 7 1/2", and cap length of 1 7/8", which equals three widths of the 5/8" oak post." To reduce weight I would recommend thinner stock for the horizontal parts, say a heavy 3/16" or a light 1/4." This gauge will do bowls up to 12" deep x 18" dia.
Here are the poplar blanks after ripping on the tablesaw, and then after quick cuts on the bandsaw.
This is the simple tool I use to pull the poplar up and off the blade after it hits the stop.
My left hand uses the hook tool to grab the end and pull up, the right hand providing a pivot point.
At all times my hands stay in front of the blade. The only danger is kickback from the wood pinching the blade, but it can't throw my fingers into the teeth.
An alternative method is to wear a neoprene glove (hunting or diving equipment) on your right hand. The grippy material will let you pull the stock back from the end under your thumb.
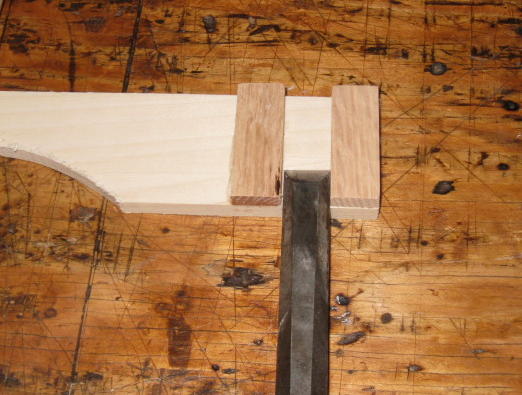
A little try square sets the stop to glue the first strip to. Accelerator is sprayed onto the main piece. Notice the thin line of medium superglue. The dry space to the right side of the strip will rest against the square when flipped over.
The first strip is glued on. Rub paraffin on one end of the oak post to prevent gluing it below.
The second strip glued in place. Remove the oak post as soon as you feel the glue has set enough to hold.
Clean out glue that squeezes into the groove.
Re-wax the post, put glue on the strips, and spray the cover piece with accelerator.
The cover piece glued on. Once again, remove the post as soon as the glue has set just a bit,
so you can jar it loose should some glue squeeze out start to glue the post into place.
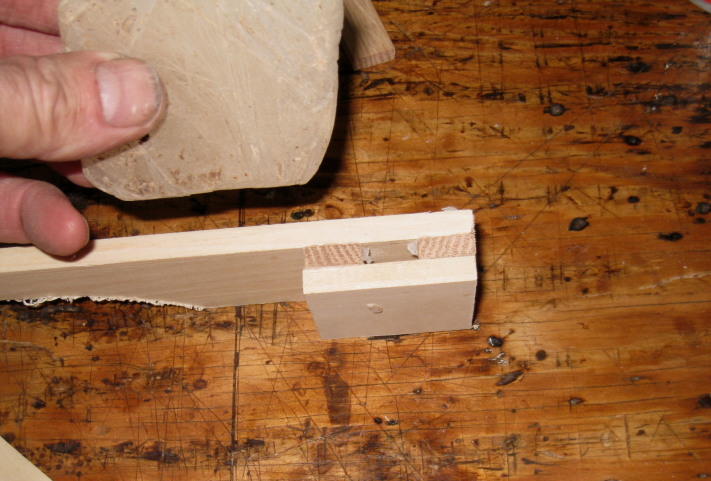
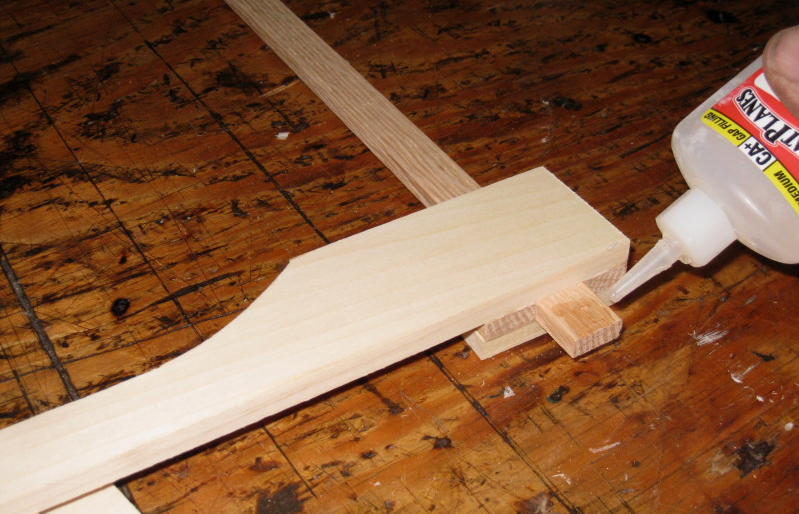
The pointer arm ready to glue onto the end of the post that was NOT waxed.
But wax the bottom of the main beam to prevent unwanted gluing.
Just a touch of glue.
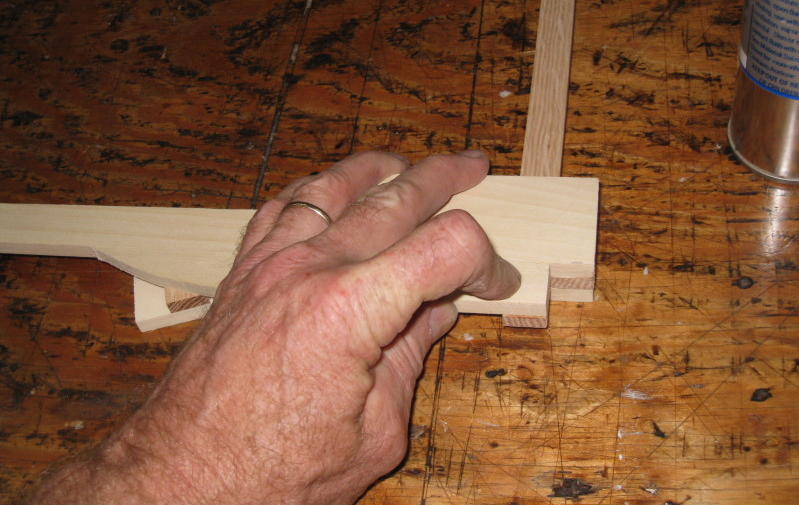
The bottom pointer glued on, with blocking to support it parallel to the main beam.
As SOON as it has set enough,
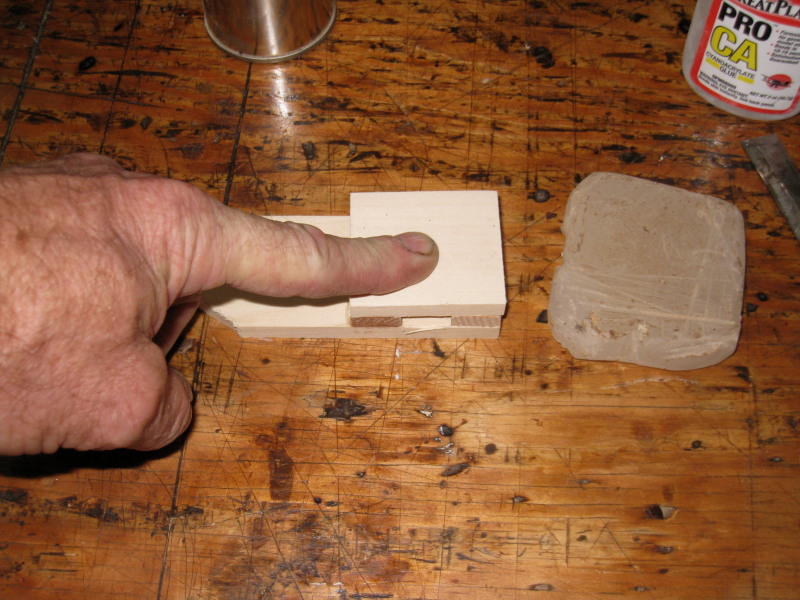
tap the oak post down to make sure nothing is glued to the main beam.
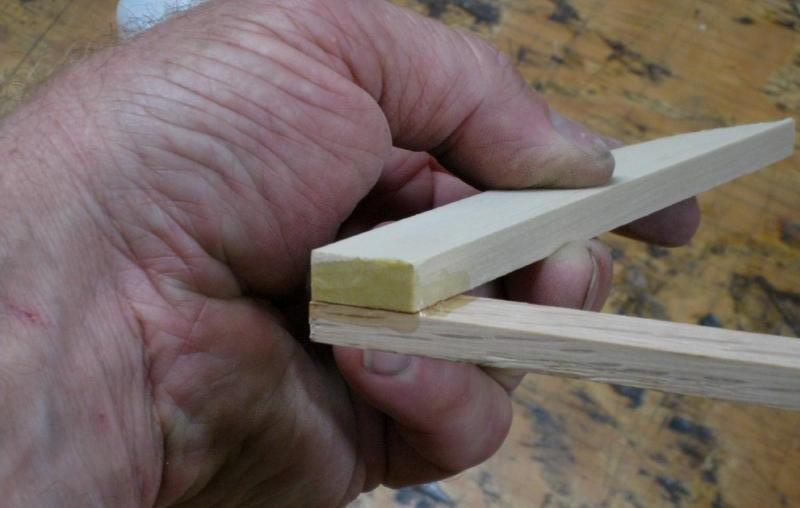
Now add glue fillets to strengthen the joint.
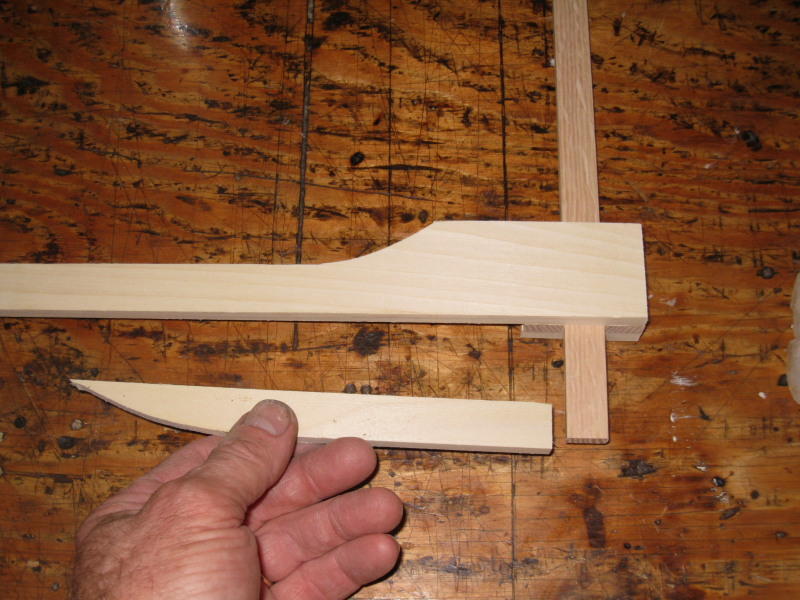
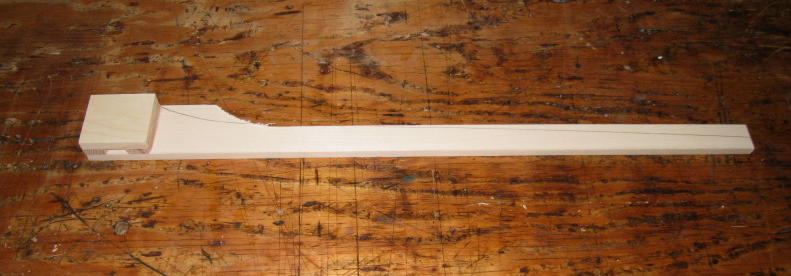
Lay out lines to taper the main beam and fair out the curve to the connector.
Sand it smooth, rounding all but the edge that faces the pointer strip.
Voila, the finished depth gauge. Sand to suit personal standards. The post may be sanded
if it is tight, then waxed for smooth operation. It should be easy to slide but it needs to hold
it's place with no rocking or tendency to slip, and you will find it gives you accurate results.
A rubber friction washer illustrated below will smooth the operation.
Small sections of automotive rubber tubing make a friction brake against the oak post.
You can adjust it to the exact firmness you want to hold it in place for a measurement.